This article is part of a series about setting up a home server. See this article for further details.
Surprisingly, this is one of the easiest bits. If you don’t mind sticking with the options presented by the GUI, Back In Time makes backups so simple it’s almost criminal not to use it. The use of the GUI itself is fairly straightforward so I’m not going to go step by step and instead go for the important bits.
Just make sure you use the root shortcut (Back In Time – root) to prevent any permissions problems.
I’ve used NTFS for the backup volume because it supports hard links and is readable by Windows machines if something goes wrong. A native Linux file system would be preferable for many, but whatever you do don’t use FAT32 (FAT32 doesn’t support hard links, so every snapshot would consume 100% of its size whether the file was changed since the last backup or not).
Creating the Job
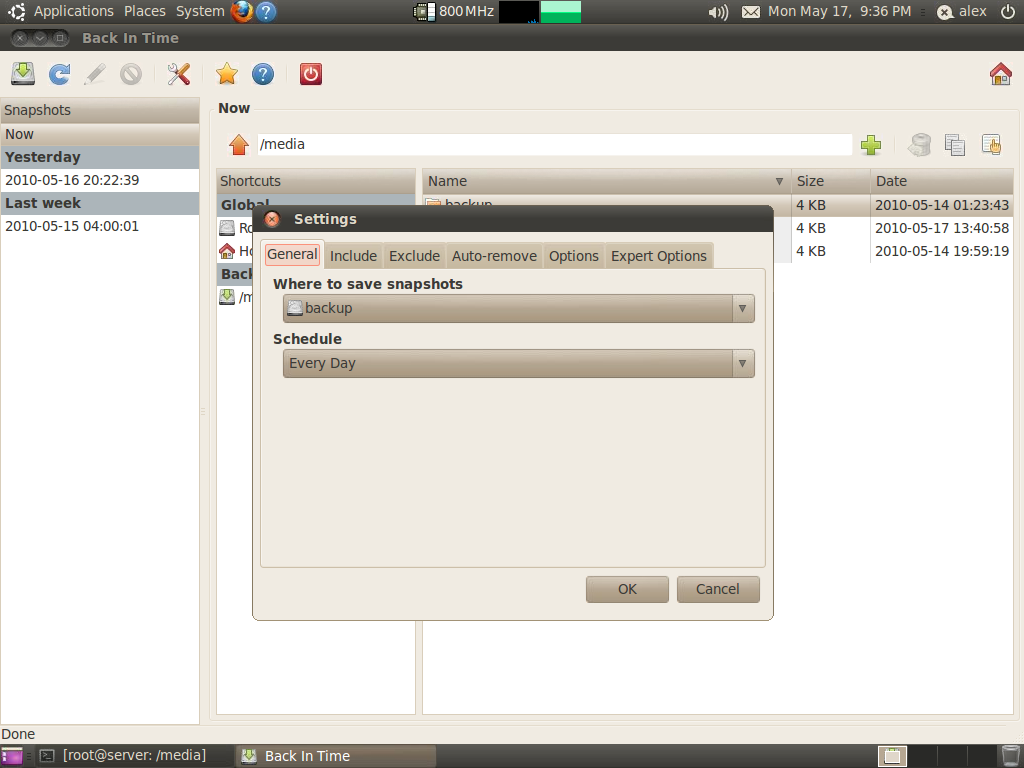
This is all done in the settings menu, which isn’t labelled but represented by the classic screwdriver and spanner icon – intuitive enough.
Under General, make sure you’re saving snapshots to your backup volume. Set the schedule to whatever you like, but I prefer to handle the schedule manually as it doesn’t give enough options. For a desktop machine the “daily” option would make sense, but as this machine will be on 24/7 I want it to run at a set time each day, not whenever it feels like it. So we will setup a cron job manually later.
Under the Include tab add your data folder (/media/data). Under exclude I removed all the preset options as I want everything on the data volume backed up. Everything that is except the lost+found folder, so I would suggest clicking Add folder and adding “/media/data/lost+found”.
The auto-remove options are up to you. I set the free space threshold to 1Gb, checked the smart-remove box, and chose not to remove named snapshots as they all seem fairly logical. The expert options don’t really need tweaking unless you want to do different schedules for different folders.
Click OK to save and you can now take a backup.
Altering the schedule
As I explained above we want to make sure the backup runs at a set time, which the gui for Back In Time doesn’t allow for, so fire up a terminal and enter the command: ‘sudo crontab -e’
The crontab is like task scheduler on Windows, but arguably a lot more powerful and flexible. The ‘-e’ option just tells crontab to edit the existing crontab instead of overwriting.
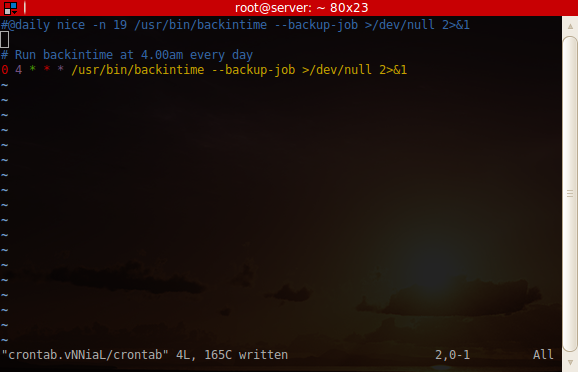
The screenshot below shows my crontab.
The @daily line is the line that the Back In Time gui added. I’m not so concerned about ‘niceness’ at 4am (nice values on Linux serve the same purpose as task priority on Windows), so I left that out. The final line is:
0 4 * * * /usr/bin/backintime --backup-job >/dev/null 2>&1
For an explanation of the crontab, see this crontab quick reference. Basically all you need to know though, is that the first number is the minute and the second is the hour. So if for example you would rather it ran at 1.30am instead of 4am, change the first number to 30 and the second to 1 so it reads:
30 1 * * * /usr/bin/backintime --backup-job >/dev/null 2>&1
Later on we will modify this to also email the result.
Important Caveat
I just discovered that the Back In Time gui blitzes any lines in the the crontab that contain the string “backintime” whenever you click OK from the preferences window. This is a rather annoying problem, as I can easily see this happening.
I recommend making sure the gui schedule is set to every day rather than disabled, which means that if someone does fiddle at least the backup will still happen once a day. The solution to this is to call a wrapper script which does not contain “backintime” in its name… I’ll update this once I’ve written and tested it.
Next part – Monitoring and email configuration


