Tag Archives: linux

Home Server – new HBA edition

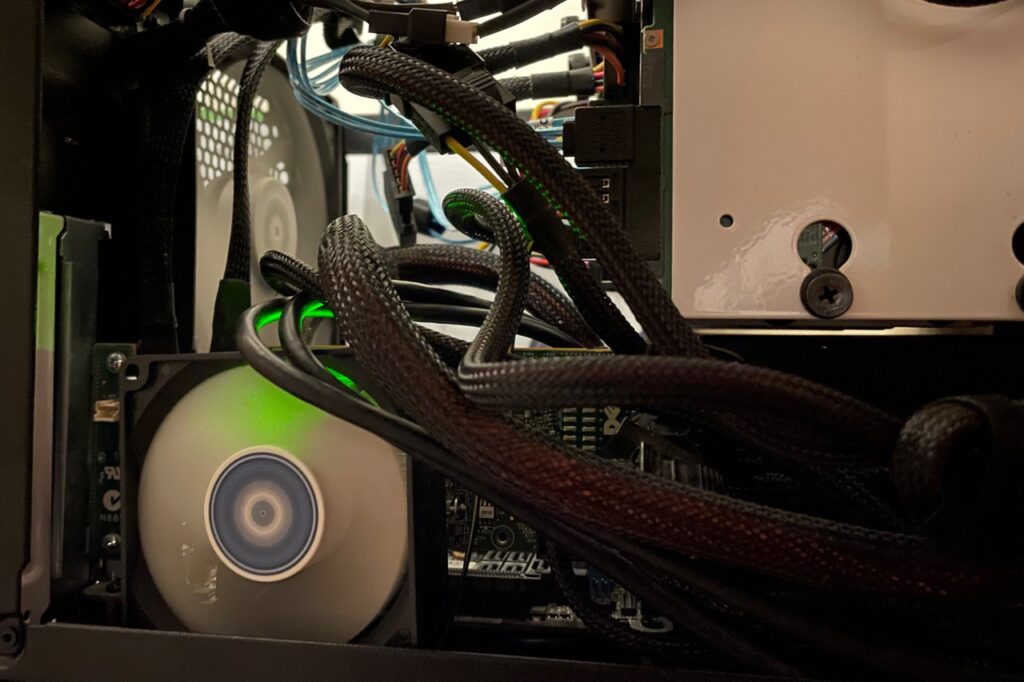
Some long time readers of this blog may remember my home server articles, the most recent being “Ubuntu Home Server 14.04 – A DIY NAS“. There haven’t been any more recently because there’s not been much to report. The server described in that article, built in 2014, has been backbone of my home network ever since.

Since then, I have swapped out hard drives a couple of times (it now contains 2x16TB Seagate Exos and 4x4TB Seagate IronWolf), doubled the ram to 8GB, and added a NVME riser card (along with a cheap 128GB NVME SSD), so I could have a separate boot drive while using all 6 SATA ports for hard drives.

Along the way it also lost HTPC and media player duties to an Apple TV, so now it’s little more than a file and backup server with Plex Media Server, Syncthing, and Duplicati installed. And the operating system has been upgraded from Ubuntu 14.04 to 16.04, 18.04, 20.04 and now 22.04.

A couple of weeks ago though, it failed. And by failed I mean, all I got was blank screen when powering on. No post, and no signs of life other than spinning fans.

My immediate thought was a loose connector, or possibly memory or motherboard failure, so I disconnected everything, blew the dust out and plugged everything back in. With the hard drives unplugged, everything worked. With 4 hard drives plugged in it still worked. Then it failed again when I connected the last two.

By now I figure I’m looking at a dodgy SATA cable, SATA port, or hard drive, but the core components are obviously fine. So why not give it a minor overhaul at the same time?

Continue reading

Archival Storage Part 1: The Problems

All of us have data which has value beyond our own lives. My parents’ generation have little record of their childhoods, other than the occasional photo album, but what little records there are, are cherished. My own childhood was well preserved, thanks to the efforts of my mother. Each of my brothers and I has a stack of photo albums, with dates and milestones meticulously documented.

Today, we are generating a massive amount of data. While the majority of it will not be of interest to future generations, I believe preserving a small, selective record of it, akin to the photo albums my mother created, would be immensely valuable to my relatives and descendants – think of your great grandparents jewellery, a photo album of your childhood that your parents created, immigration papers of your predecessors.

Modern technology allows us to document our lives in vivid detail, however the problem is that the data is transient by nature. For example, this blog is run on a Linode server – if I die, the bill doesn’t get paid and Linode deletes it. If Linode goes away, I have to be there to move it to a new server. If Flickr goes away, my online photos are lost. If Facebook goes away, all that history is lost. Laptops and computers are replaced regularly, and the backups created by previous computers may not be readable by future ones, unless we carry over all the data each time.

In part one of this series (this article) I document the problems of common backup solutions for archival storage, with reference to my own set-up. In part two, I’ll detail my “internet research” into optical BD-R media and how it solves these problems, and in part 3 I’ll deal with checksums and managing data for archival (links will be added when done).

Part 1 is fairly technical, so if you just want safe long-term storage, install and configure Crashplan, and skip to part 2.

Continue reading

Ubuntu 14.04 – No USB keyboard after upgrading kernel

After upgrading my Ubuntu 14.04 LTS install from linux kernel 3.13 to 3.16, USB input devices, particularly my keyboard, stopped working.

On rebooting to an older kernel, the keyboard worked again. The reason for this, is that the base kernel package doesn’t include the usbhid module, which is require for USB input devices.

The solution, is to install the linux-image-extra package for your kernel. In my case it was:

[shell]
sudo apt-get install linux-image-extra-3.16.0-28-generic
[/shell]

You can either do this via ssh, or boot to an older working kernel first.

Afterwards, you should be able to do [shell]modprobe usbhid[/shell], or simply reboot, and your usb input devices should function correctly.

Pausing Spotify and playing a random video in Python – A party trick for Halloween

For a Halloween party last weekend I wrote a python script to pause Spotify, play a random video and start music playback again. The videos were basic ogg files I cobbled together which showed a scary image and evil laughs or screaming with OpenShot. I can’t really share them, as I don’t have rights to the media, but it’s pretty simple to recreate them yourself.

The code for this script is on Github, and I’ve reproduced the latest snapshot below. Feel free to fork and improve if you want to scare your guests, or add support for other OS’s. Presently it only supports Linux because I used dbus to perform the play/pause actions.

[python]
#!/usr/bin/python

”’
This is a Halloween party script which pauses Spotify and plays a video
at random intervals.
”’

import random
import subprocess
from subprocess import call
from time import sleep
import os
import datetime

start_time = datetime.time(21, 0, 0)
stop_time = datetime.time(23, 0, 0)

video_dir = ‘/home/alex/Videos/scream/’
videos = { ‘scream1_nofade.ogg’: 30,
‘happy.ogg’: 1,
‘evil_laugh.ogg’: 5,
}

def time_in_range(start, end, x):
“””Return true if x is in the range [start, end]”””
if start <= end:
print(“start<end”)
return start <= x <= end
else:
print(“end<start”)
return start <= x or x <= end

def weighted_choice(weights):
total = sum(weights for video in weights)
r = random.uniform(0, total)
upto = 0
print(“total: %s\nrandom: %s” % (total, r))

for video in weights:
w = weights
if upto + w > r:
return video
upto += w
assert False, “shouldn’t get here”

def spotifyPause():
command = “dbus-send –print-reply –dest=org.mpris.MediaPlayer2.spotify /org/mpris/MediaPlayer2 org.mpris.MediaPlayer2.Player.Pause”
print(“pausing spotify”)
os.system(command)

def spotifyPlay():
print(“playing spotify”)
command = “dbus-send –print-reply –dest=org.mpris.MediaPlayer2.spotify /org/mpris/MediaPlayer2 org.mpris.MediaPlayer2.Player.PlayPause”
os.system(command)

def play_video(video_file):
print(“Playing %s” % video_file)
#call([‘/usr/bin/mplayer’, ‘-fs’, video_file], stdout=None, stderr=None)
#result = subprocess.Popen([‘/usr/bin/mplayer’, ‘-really-quiet’, ‘-fs’, video_file])
result = subprocess.check_call([‘/usr/bin/mplayer’, ‘-really-quiet’, ‘-fs’, video_file], stdout=None, stderr=None)
return result

def playBuzz(buzzfile):
print(“Buzz…”)
result = subprocess.check_call([‘/usr/bin/mplayer’, ‘-really-quiet’, ‘-ss’, ’18’, buzzfile], stdout=None, stderr=None)
return result

def infiniteLoop():
while 1:
current_time = datetime.datetime.now().time()
#if current_time > stop_time or current_time < midday:

choice = weighted_choice(videos)

random_time = random.randrange(1200,2400)
random_time = 3

video_file = video_dir + choice
print(“Chose video %s after %s seconds” % (video_file, random_time))
sleep(random_time)

# Whether to play buzz
buzz = False
if random.randrange(0,100) > 90:
buzz = True

# Continue if outside time range
if not time_in_range(start_time, stop_time, current_time):
print(“Not playing video, outside time range”)
continue

# Do it
spotifyPause()
if buzz:
playBuzz(‘/home/alex/Videos/scream/audio/buzz.mp3’)
play_video(video_file)
spotifyPlay()

if __name__ == “__main__”:
infiniteLoop()
[/python]
Stopping the Intel WiFi LED from blinking in Ubuntu

My Dell E4300 has an Intel 5100 wifi card and the led blinks constantly. I still don’t understand how Intel can consider blinking the wifi LED during data transfer to be a sensible default. For most people it blinks non-stop which is both uninformative and irritating.

Fortunately blogger Alex Cabal found a solution for Karmic, and his updated solution also works for Natty/11.04. It describes opening a text editor and pasting a couple of lines, however I’m much lazier so here’s the one-line version:

echo 'options iwlcore led_mode=1' >> /etc/modprobe.d/wlan.conf

Of course, the command above must be run as root (sudo -i), for some reason sudo gave me access denied. You also need to reboot… or you could just unload and reload the module:

modprobe -r iwlagn && modprobe iwlagn

The double ampersand just executes the next command if the previous one succeeded (exit status 0).

Update

As of Ubuntu 11.10 (kernel 3.0.0) the option has to be applied to the iwlagn module, options for iwlcore are ignored. Thus the full solution now becomes:

sudo -i
echo 'options iwlagn led_mode=1' >> /etc/modprobe.d/wlan.conf
modprobe -r iwlagn && modprobe iwlagn

Setting up a secure Ubuntu LAMP server

Disclaimer: This article is provided for your information only, and simply following this guide will not make your server “secure”. As the server administrator you are ultimately responsible for its security!

Intro

Having recently been through the process of setting up a few Ubuntu LAMP (Linux, Apache, MySQL, PHP) servers lately I thought I’d make an article out of my notes and provide a starters guide to setting up the LAMP stack on Ubuntu.

It goes without saying that the only truly secure computer is one with no network connection, no ports or input devices and is locked in a bank vault, but such a machine is not terribly useful. Regretfully, compromises must be made to allow functionality! Besides presuming insecurity, there are a lot of things you can do to make your server more secure and keep out the vast majority of would-be hackers running port scans, meta-exploit scripts and dictionary attacks.
Continue reading

Recovering a RAID5 mdadm array with two failed devices

Update 1/11/2019

If you’ve reached this article by Googling how to recover a RAID array, I suggest you don’t use this guide. The Linux RAID wiki has much more correct, complete, and authoritative information. In retrospect I was very lucky not to destroy the data, but this article is an interesting account of how I did it.

Update

Before reading this article you should know that it is now quite old and there is a better method – ‘mdadm –assemble –force’ (it may have been there all along). This will try to assemble the array by marking previously failed drives as good. From the man page:

If mdadm cannot find enough working devices to start the array, but can find some devices that are recorded as having failed, then it will mark those devices as working so that the array can be started.

I would however strongly suggest that you first disconnect the drive that failed first. If you need to discover which device failed first, or assemble doesn’t work and you need to manually recreate the array, then read on.

I found myself in an interesting situation with my parents home server today (Ubuntu 10.04). Hardware wise it’s not the best setup – two of the drives are in an external enclose connected with eSATA cables. I did encourage Dad to buy a proper enclosure, but was unsuccessful. This is a demonstration of why eSATA is a very bad idea for RAID devices.

What happened was that one of the cables had been bumped, disconnecting one of the drives. Thus the array was running in a degraded state for over a month – not good. Anyway I noticed this when logging in one day to fix something else. The device wasn’t visible so I told Dad to check the cable, but unfortunately when he went to secure the cable, he must have somehow disconnected the another one. This caused a second drive to fail so the array immediately stopped.

Despite having no hardware failure, the situation is similar to someone replacing the wrong drive in a raid array. Recovering it was an interesting experience, so here I’ve documented the process.
Continue reading

Splitting files with dd

We have an ESXi box hosted with Rackspace, it took a bit of pushing to get them to install ESXi it in the first place as they tried to get us to use their cloud offering. But this is a staging environment and we want something dedicated on hardware we control so we can get an idea of performance without other people’s workloads muddying the water.

Anyway, I’ve been having a bit of fun getting our server template uploaded to it, which is only 11GB compressed – not exactly large, but apparently large enough to be inconvenient.

In my experience the datastore upload tool in the vSphere client frequently fails on large files. In this case I was getting the “Failed to log into NFC server” error, which is probably due to a requisite port not being open. I didn’t like that tool anyway, move on.

The trusty-but-slow scp method was also failing however. Uploads would start but consistently stall at about the 1GB mark. Not sure if it’s a buffer or something getting filled in dropbear (which is designed to be a lightweight ssh server and really shouldn’t need to deal with files this large), but Googling didn’t turn up much.
Continue reading

Bash script to alert when memory gets low

We have a web server that’s running out of memory about once every couple of weeks. The problem is that when it happens the swap file is totally full, the system is unresponsive and it usually needs a hard reboot. So it’s a bit difficult to debug. To avoid digging through log files I don’t understand I elected to put a script in /etc/cron.hourly which checks the total amount of free memory (including swap and physical). If there is less than 256mb free (this server has 512mb of ram and a 1gb swap so at this point the situation is serious), it dumps the process list to /tmp/processes.txt and sends me an email with it attached.

Note that mutt must be installed (‘apt-get install mutt’ on Debian/Ubuntu, or ‘yum install mutt’ on RedHat/CentOS).

#!/bin/bash

free=`free -mt | grep Total | awk '{print $4}'`

if [ $free -lt 256 ]; then
        ps -eo %mem,pid,user,args >/tmp/processes.txt
        echo 'Warning, free memory is '$free'mb' | mutt -a /tmp/processes.txt -s "Server alert" [email protected]
fi

Then of course make it executable and symlink to cron.hourly:

chmod +x /etc/scripts/memalert.sh
ln -s -t /etc/cron.hourly/memalert.sh /etc/scripts/memalert.sh