Three years ago, on a bit of a whim, I bought a Canon EF-S 10-22mm lens. The action was probably symptomatic of Gear Acquisition Syndrome, but I’ve fortunately managed to keep it under control since – I’m still using the same set of lenses I bought around that time!
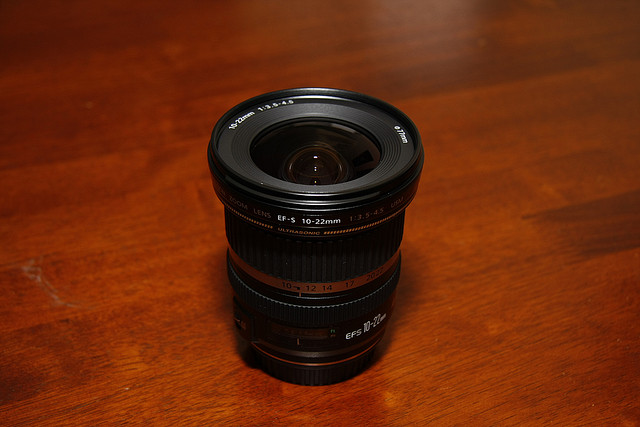
It was a pricey item, and to this day I don’t really know what possessed me to spend such a sum on a piece of glass that I didn’t really know how to use. What’s more, I wasn’t sure I’d use it regularly. But all the pictures in this article were taken with it, and these days it hardly leaves the camera.
Others have asked me about wide angle photography, and I’ve even loaned my 10-22 out a couple of times, so I thought it was about time I put down some words about traveling with a wide angle lens.
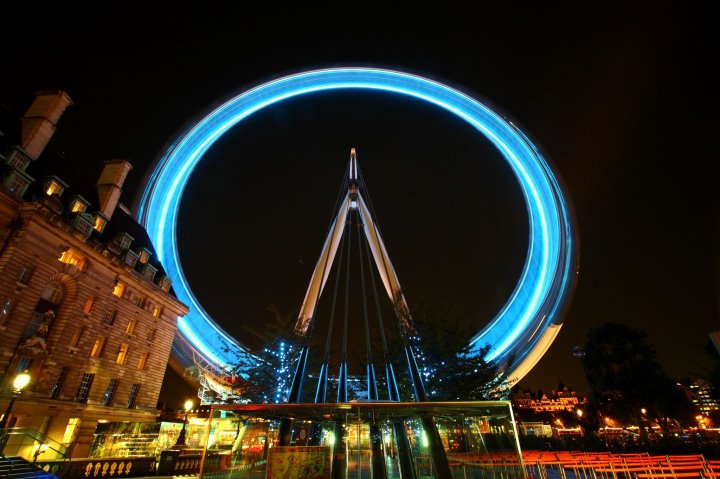
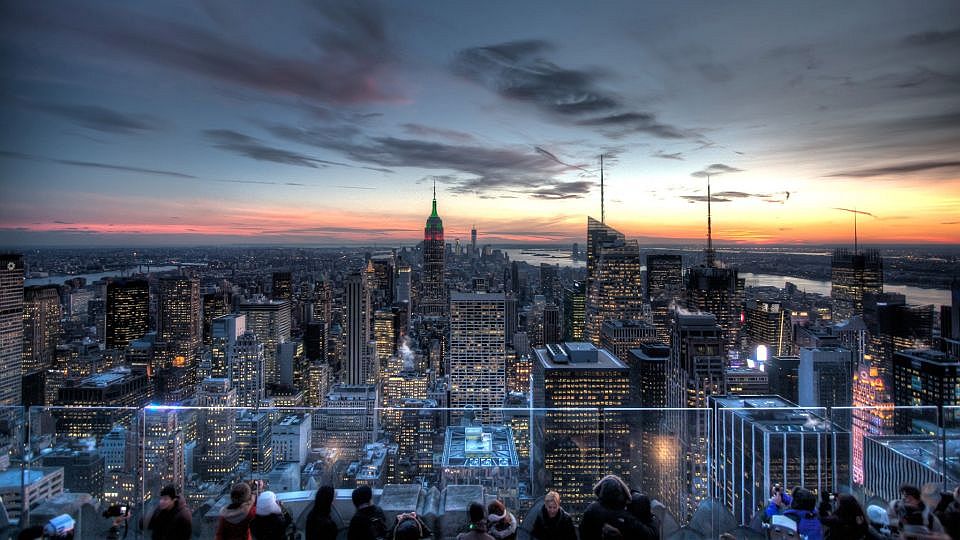
Long exposure of the London Eye
Travelling is not a standard activity
Conventional wisdom would suggest a general purpose “standard” lens with a broad range is the best lens to travel with. And it’s hard to argue against the standard kit that ships with a lot of APS-C DSLRs. The 18-55mm + 55-250mm
combination covers an incredibly useful range, is lightweight and very cost effective. However most people end up leaving the 18-55mm on and forgetting about the 55-250. In the end you’ll probably wonder why you brought it along at all. What’s more, I found that the vast majority of my shots were taken at the widest setting – 18mm.
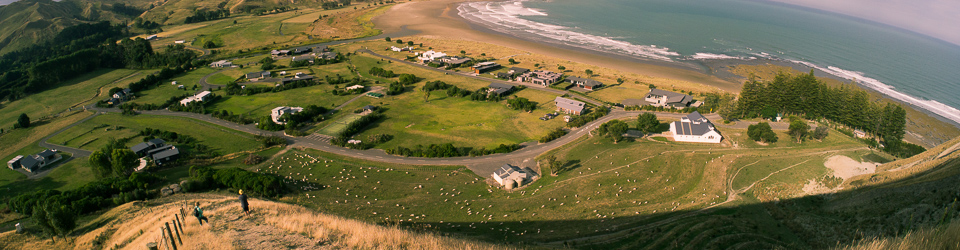
Landscape at dusk of Foxdown farm, Canterbury, New Zealand
I like to avoid changing lenses when possible and was on a tight budget, so my first lens purchase after the original kit was a second-hand copy of a standard zoom with a longer reach – a Canon EF-S 17-85mm IS USM.
The major flaw with this lens was its poor performance at 17mm, which also happened to be my most-used focal length. Barrel distortion and chromatic abberation were very noticeable at 17mm, but easily correctible with software. USM focus and IS were nice to have, and this lens remains a good step up from the cheaper kit lens, but the more recent Canon EF-S 15-85 mm f/3.5-5.6 IS USM Lens and Canon EF-S 18-135 mm f/3.5-5.6 IS Lens
are both much better options today. The 15-85mm lens in particular is very good; if I were forced to weld a lens to my camera, it would be this one.

Medieval lane in Wells, England
Eventually I decided I wanted to go wider and longer without compromising on image quality, and was on less of a budget, so I resigned myself to changing lenses and purchased the Canon EF 70-200mm f/4.0 L USM Lens, and Canon EF-S 10-22mm f/3.5-4.5 USM Lens
. Both these lenses are an absolute joy to use, and I’ve had great images out of both of them, but you can probably guess which one has had more use.
The Big O.E.
In 2010 I decided to head overseas. Naturally, the most important decision one must make when travelling is what photographic equiqment to take!
The 70-200 f/4L is a poor travel lens. While not especially heavy, it’s still large compared to kit zooms, and being white it stands out like the Pope visiting a ghetto. It’s a useful range, but you wouldn’t walk around with it all day. I’ve taken it to armistice day celebrations, rugby games, the Formula One and animal spotting, but every time I’ve boarded a plane it’s been sitting at home.
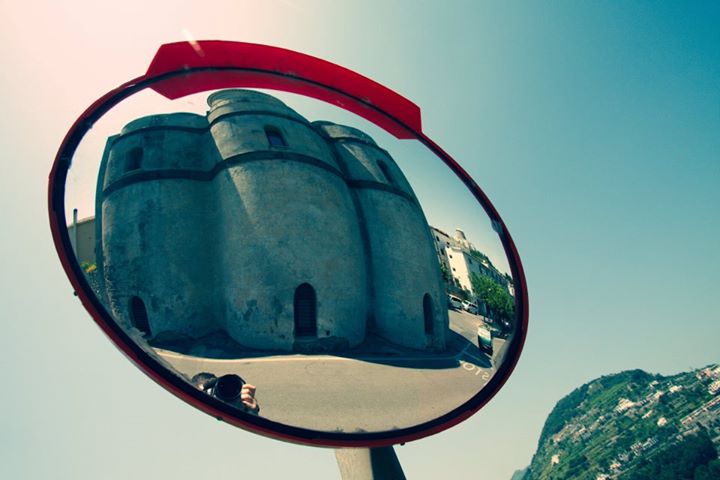
Roadside mirror in Amalfi, Italy
So the 70-200 was out but I decided 85mm just wasn’t long enough any more, so I sold the 17-85 and purchased a Canon EF-S 18-200mm f/3.5-5.6 IS, expecting it to become my standard travel lens. It’s pretty big and heavy, weighing significantly more than the 17-85, in fact more than the 18-55 and 55-250 combined. Strapping it to a 40D results in a gloriously balanced but weighty chunk of metal, glass and plastic that could inflict significant damage should the need to defend oneself arise. But duality as a weapon was never a consideration.
The 18-200 lens covers a very broad range, produces good images (less chromatic aberration at wide than the 17-85 but more distortion) and is a very capable general-purpose lens. Compared to most in its class it’s also rather good at its maximum reach and widest aperture settings. Focusing it manually sucks as there’s no USM, but despite this the AF works well and having IS is rather nice. So why would you need anything else?
Truthfully, you don’t. :)
Thus I hesitated to pack the 10-22. It has a very limited range, and is somewhat a specialist tool. But as it’s not an especially large or heavy lens I decided to take it with me anyway. I also threw in the plastic fantastic 50mm – it’s so small and light it’s barely noticed.
The focal length stats told the story:
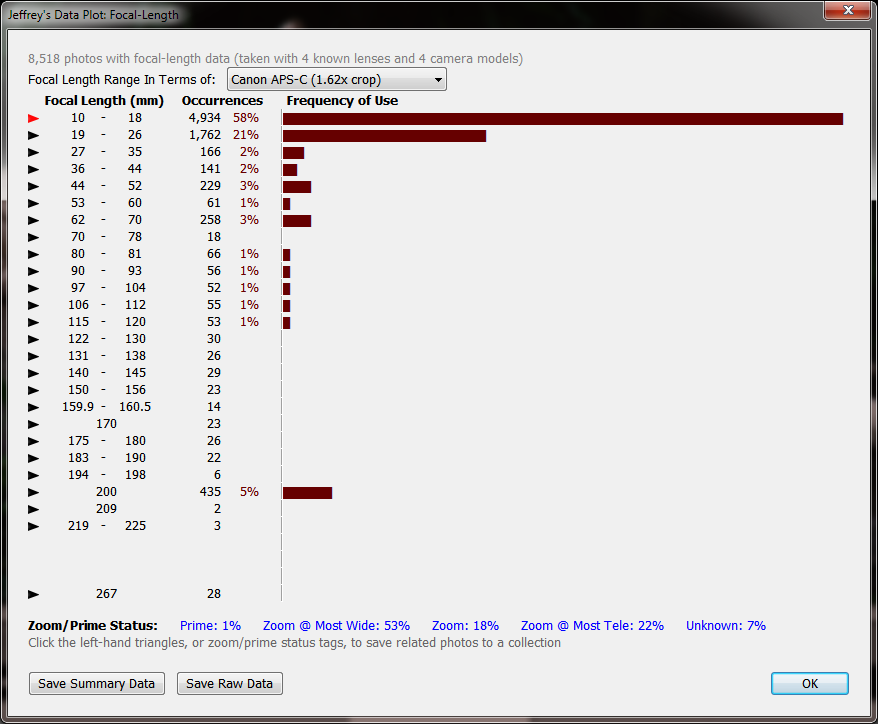
A plot of the focal lengths used during my travels in 2010
The majority of the shots I took were at wide angles, the lens I should have been debating whether to pack was the 18-200!
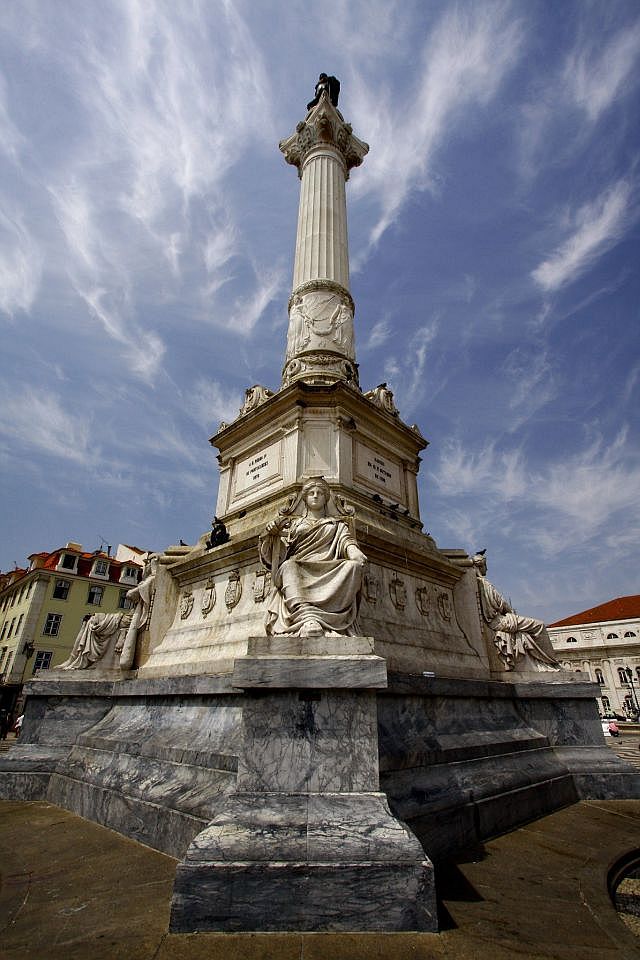
Statue in Lisbon, Portugal
I struggled a bit to find images for this article, as I don’t use wide angles particularly well. Too often I use 10mm to “get it all in”, when really they are for creating interesting perspectives and giving more context than would be possible with narrower fields of view. I’m also guilty of snapping off a landscape without giving much thought to composition, or finding an interesting foreground subject!
Occasionally I do get it right, so below I’ve written a few tips for shooting with such a wide angle. Obviously they don’t apply to every shot, but hopefully the examples will show what I mean.
Tip number 1 – Get close
This is probably the most obvious, but wide angles allow you to get much closer to large objects, and create interesting perspectives by converging parallel lines.
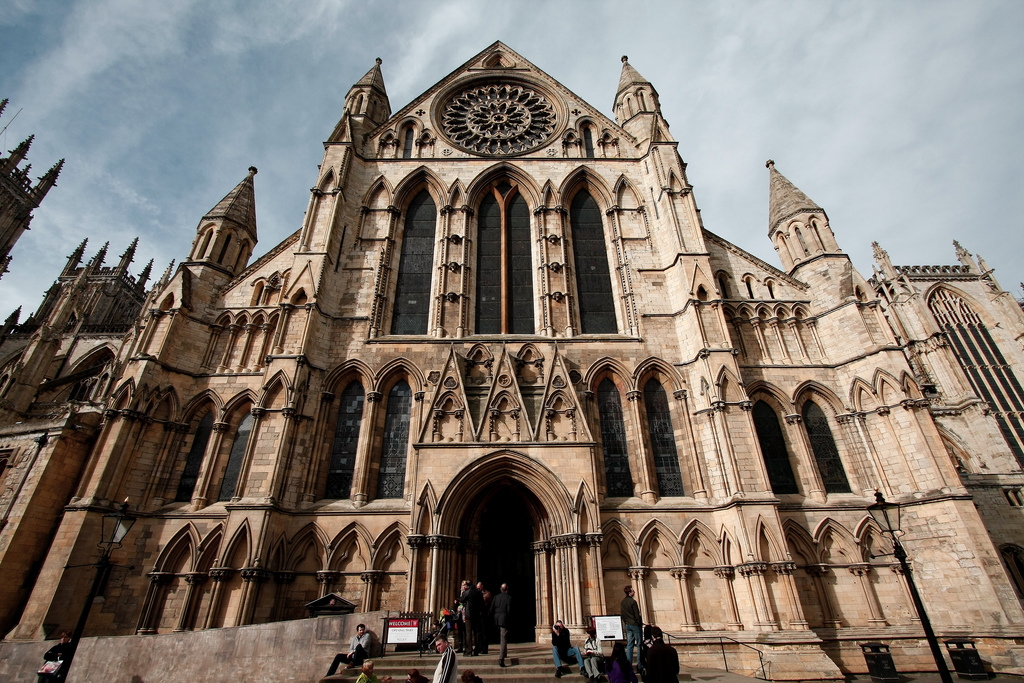
York Minster, York, England
For maximum sharpness, be sure to use f/8 or narrower, and set focus on the nearest point (the base of the building if you’re looking upwards).

Side view of Sagrada Familia
Tip number 2 – Look for a foreground subject
Landscapes can be uninteresting without something to place in the scene. Try to find an object to occupy the foreground. Set the apperture narrow (f/8 – f/10) for maximum depth of field, or if you’re close enough use a wider aperture to create a little background blur and emphasize your subject.

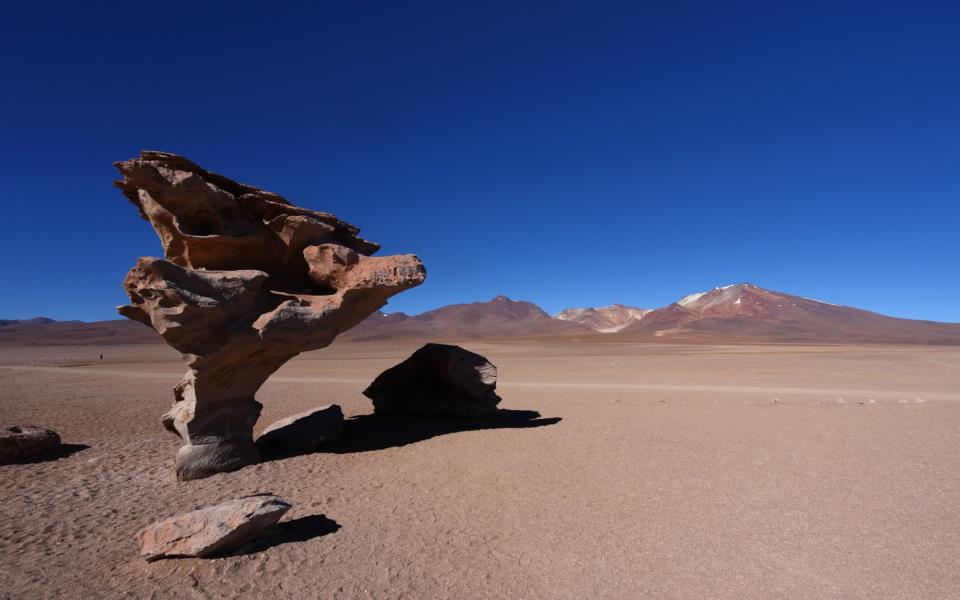
Salt Crystal, Salar de Uyuni, Bolivia

Stuck in the desert near Uyuni, Bolivia
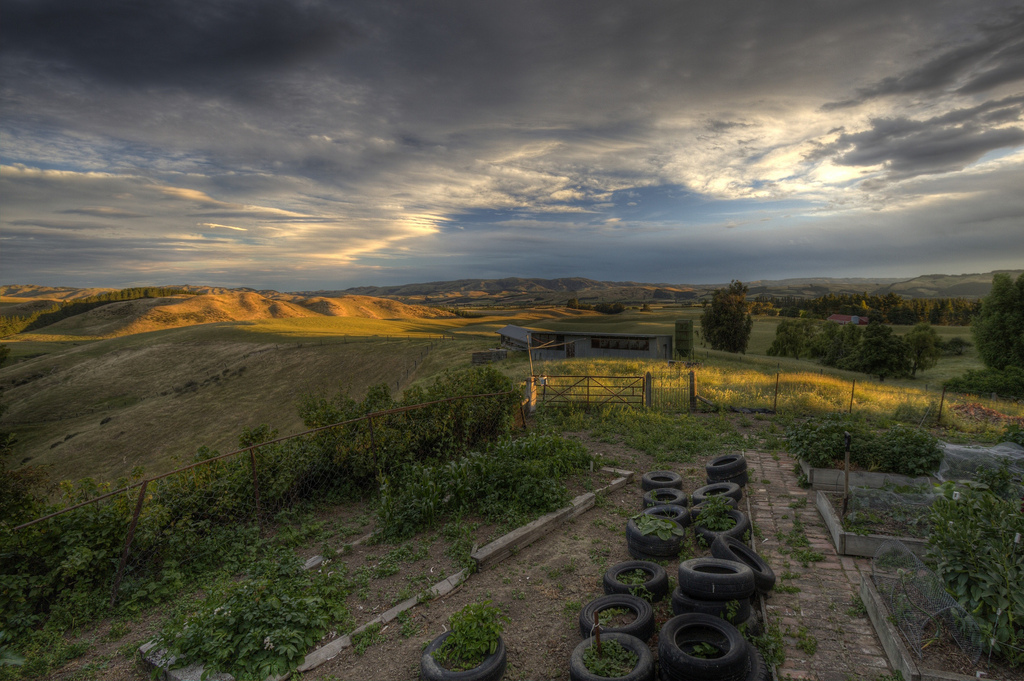
Tip number 3 – Crop panoramas
If number 2 fails and you find yourself taking a wide landscape with nothing in the foreground (hey, we all take them), be sure to crop to a wide aspect ratio (e.g. 16:9). This reduces the “dead space” in the foreground and focuses on the interesting parts, which are probably going to be around the horizon.

Positani, Italy from the ferry
View from the top of the Rock
Tip number 4 – Don’t fear the polariser
Some people advise not to use a polariser with wide angle lenses because of the uneven skies it creates. Also because of the wide angle of entry, the effect is stronger at the edges and weaker at the centre.
Tree Rock in the Uyuni desert, Bolivia
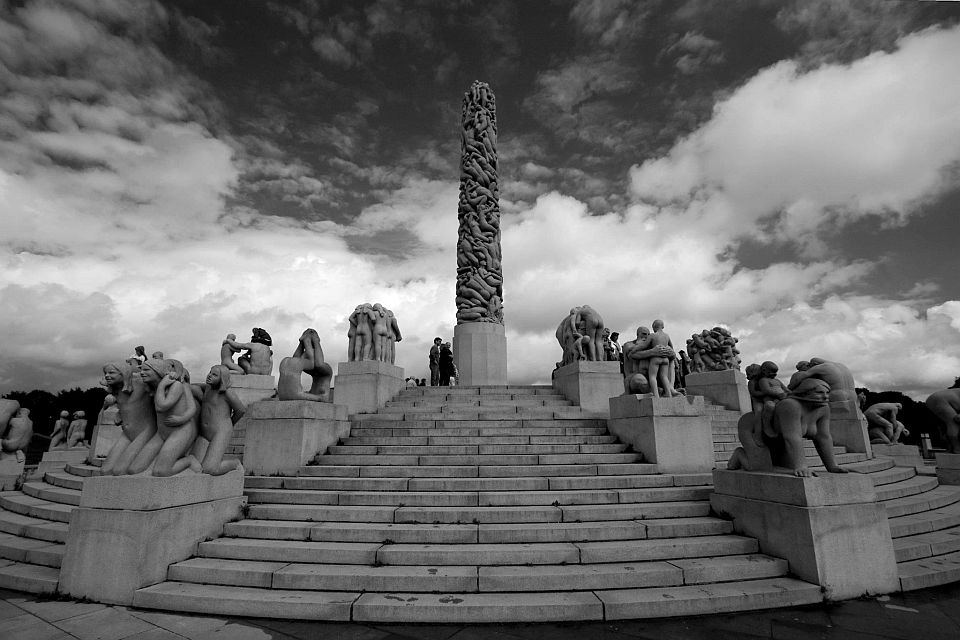
A statue in Oslo. Polariser created a much deeper contrast between the sky and clouds.
Yes, you can get some strange effects and I’ve ruined more than a few shots by having the polariser rotated the wrong way, but it’s usually possible to create a desirable effect. If you embrace it you can create some dramatic skies, just be sure to spend a bit extra on the thin variety to avoid vignetting, I use a Hoya 77mm Pro-1 Digital Circular Polarizing Filter.
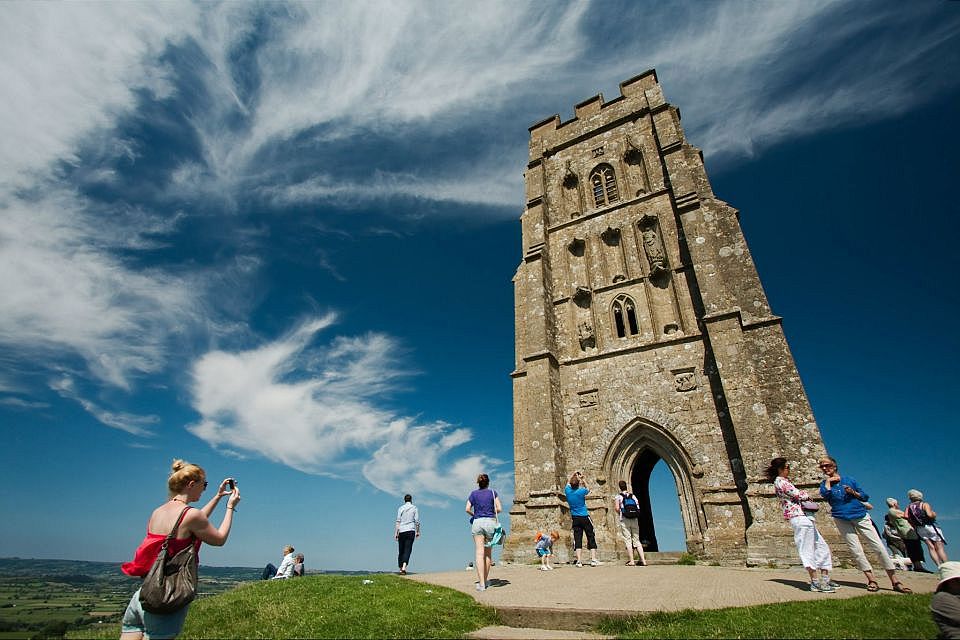
In this photo of Glastonbury Tor the Polarising effect is a little uneven, but it still enhanced what would otherwise have been an uninteresting sky
Tip number 5 – Embrace interiors
Wide angles are great indoors. They make small spaces appear larger, and give a viewer a better sense of being in the room with you. The big disadvantage of wide angle lenses for indoor use is that they tend to have narrow apertures requiring higher ISO. Don’t be tempted by a Canon EOS 6D and 16-35mm f/2.8
…
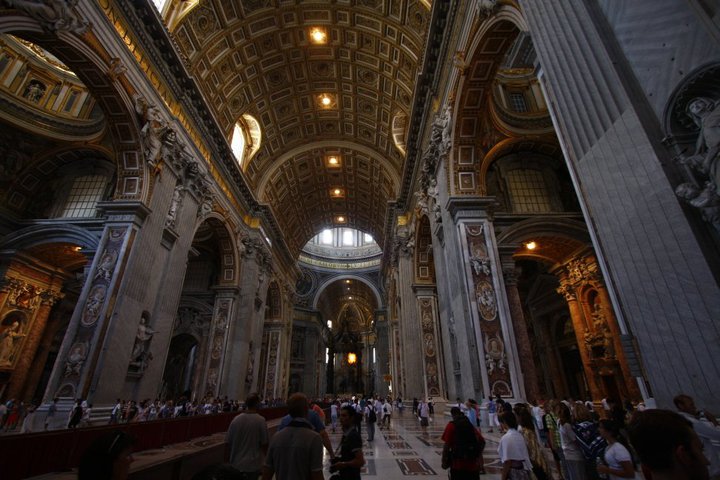
St Peter’s Basilica, The Vatican

Inside of Sagrada Familia, Barcelona, Spain
Which wide angle lens to buy
If I was buying again today, I’d probably purchase the Sigma 10-20mm f4-5.6 instead, simply because it’s a lot cheaper and the image quality is about the same. You do lose 2mm at the long end and half a stop at the wide end vs the Canon, but wide lenses should be used most often at 10mm with maximum depth of field anyway. The Sigma also has HSM (equivalent to Canon’s USM), and I don’t feel the extra range or slight light gathering ability advantage justifies the £250 price gap.
Wrap-up
As you’ve no doubt realised by now I’m a huge fan of wide angles. All the images in this article were taken with my trusty EOS 40D, and Canon 10-22mm lens.
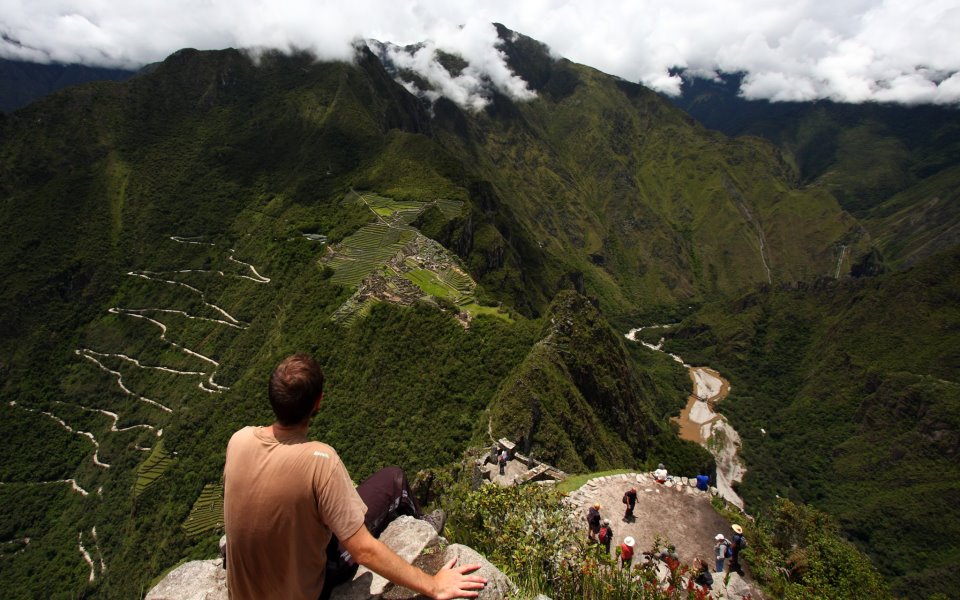
Wayna Picchu, overlooking Machu Picchu, Peru
So if you’re travelling in the near future and plan to photograph landscapes or buildings with your SLR, I highly recommend adding a wide-angle lens to your kit bag!
Great article. I found you through Google. I have the 18-55mm + 55-250mm combination too, but never use the latter and want something wider than the former. Consequently, I use my 50mm much more. Thanks for the rec about the Sigma because I thin that is where I’ve been leaning towards as well.
Hi Athena, thanks for the kinda words. Enjoy the Sigma!
Through a quite similar path my kit comprises of the 17-85, 10-22, 70-200 4L and a stubborn copy of the EF 50 II 1.4. I bought my first camera, a 400D and the 10-22 in a similar lapse to Gear syndrome, for the sole purpose of wide-angle landscape photograpy. I have by now outgrown the use and the camera but what I find even more restrictive is the low image quality of the 17-85. It can be ok if you stay in the sweet spots, but never great.
Recently my 17-85 was under repair for a defective diaphragm and I chose the 70-200 and the EF 50 for a light-weight solo weekend detour to Marakech. It was fun.
Did I miss many 70-200 shots for fear of attracting more attention ? Oh, did I. I missed the best ones, the cult shots where more discrete gear or a less indiscrete operator would make a difference. Felt just like the Pope in the ghetto indeed.
Did I manage some worth-while shots with the 70-200 that I wouldn’t otherwise catch: You bet.
And should I regret skipping the 10-22 for the trip ? At the time I suspected so. After reading your article I am pretty certain. I will be looking for a new angle in the wide, thanks for sharing.
An Athenian (Greek) here :-)
You’re welcome Aggelos, thanks for the comment. Glad to hear you’re giving the 10-22 another shot!
ALL your images are offline.
Thanks for letting me know, it should be fixed now!